If you’re just starting your family portrait photography business and want to know what to actually do for the hour you’re with the family who graciously asked you to take their yearly portraits, then I have your answer. When you’re working with families–especially those with little kids–how you spend your first hour-session with them can make or break a long-term business relationship. Remember, a one-hour session with a young family can turn into annual sessions, birthdays, weddings, baby showers, you name it.
There are over 50 small tips and tricks here. You have one hour with a new family. Here’s exactly what you need to do from start to finish.

1. Prepare the night before
Okay, I know, this isn’t technically for the hour you’re with the family. But preparing the night before will make the day-of and drive-to location that much easier and stress free. Charge your camera battery. Reformat your memory cards. Clean your lenses. Add extra batteries to your bag. (Don’t forget the batteries! I had to stop at Home Depot once with only five minutes to spare before arriving at a family’s home.)
If you do this, you should prevent that moment of panic I tend to have about five minutes after I get in the car. Do I have my camera body? Did I put a memory card in it? Do I have any lenses? Without fail, I always have a mini-freakout on the way despite checking my bag again right before I walk out the door. The paranoia is good, though, right? It makes me quadruple-check everything before I go.
Get your gear ready the night before and rest easy.
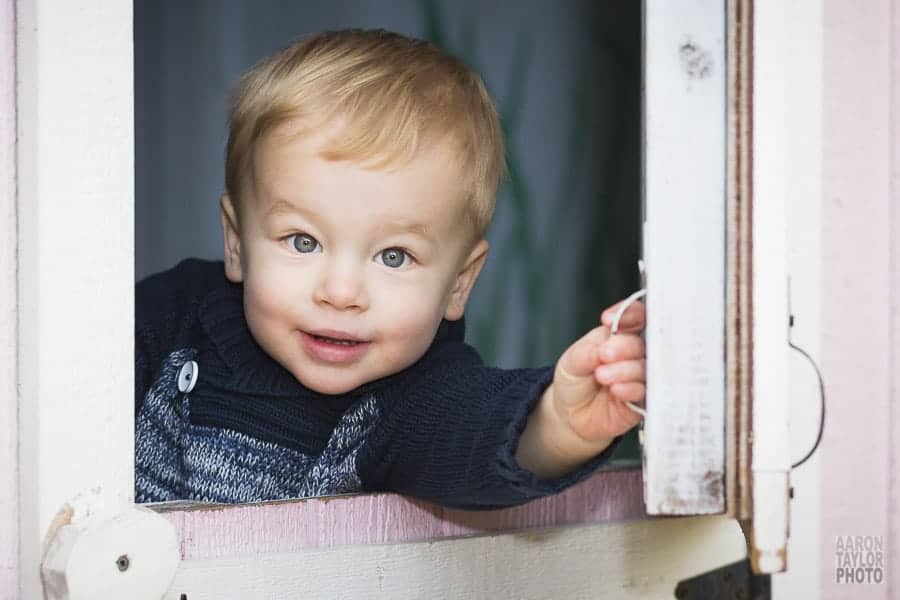
2. Arrive early
It’s never a good look to show up after your client. Arriving early respects their time and shows how dedicated you are to their session.
These days, chances are your family session is on-location somewhere out in nature. If you’ve been there before, great! You have a tremendous advantage now. Nothing can halt a session faster than searching around for a great background. You don’t want your family to become nervous as you search the area for the right setting.
But don’t forget: if the background isn’t perfect, tell them how amazing it is anyway. Nothing is more important than complimenting your clients on how they look in the scene.
When in doubt, find some shade and open your aperture as much as you reasonably can–at least no one will be squinting and your background will be soft. If you don't have any shade, put their backs to sun. That'll prevent them from squinting too much. It'll also give them a decent rim light. Plus, there's a chance the ground may reflect some light back up to their faces for some decent fill light. (Just be careful that you don't blow out the background too much!)
If you don’t know the location, then being early will allow you to scout a handful of backgrounds for your first few poses. You don’t need to have the entire hour planned, but having something in place for the first ten minutes really helps build everyone’s confidence and comfort.
(Quick note: get a pair of good hiking shoes. Even if you're just walking around playgrounds and paved paths, hiking shoes give support, protection, and grip. The sticky rubber on the soles of a good pair of hiking shoes is a must-have. Here's what I have right now. I have also LOVED these in the past. Don't miss a shot because you're worried about slipping–get hiking shoes.)
Arriving early also allows you to double-check your initial exposure settings, too. With settings in place right away, you’ll be able to shoot in those first few crucial minutes.

3. Don’t waste the first few minutes
The parents are always slower to get things started than the kids. Parents are always getting a stroller ready or doing one last primp. Use the extra energy and readiness of the kids to your advantage.
If one of the kids is an infant that is getting cozy in a stroller or needs a last minute diaper change, take the other kids and start shooting. Say that you “need help” setting up the camera or finding a good spot. Most kids will love the attention and the opportunity to explore a little without their parents.
If a kid is shy, get down to their level and show them the camera. Ask them if they can see it “wink” when the shutter clicks. Show them the photo you just took and say how great they look in it.
The parents should also appreciate that someone else is taking care of their kid for a minute. I have two little ones. Any moment when someone else occupies their attention is a welcomed mental break.
Even with teenagers, take the first few minutes to connect with them. Talk about school or hobbies or college plans. While teenagers are certainly used to taking selfies, they still tend to turn sheepish around a “real camera.” Again, “test your settings” on them. Tell (and show!) them how great they look.
I can't emphasize this enough: don't waste the first few minutes waiting for or talking to the adults. (Though don't be dismissive either. Everyone deserves your attention.) If you're signing contracts or running down a list of poses, you never know what candid moment you'll miss with an energetic and curious child. Say hi, shake hands, and start taking pictures.
4. Get your poses done early
With most people, parents and kids alike, you have about fifteen minutes before they're either bored or frustrated. (Don't worry, you'll still use the whole hour. I'll tell you how below.) If you emailed the client previously about any poses or combinations that the family absolutely must have, do those first. Early on, the kids won't mind sitting on laps or smiling. These are the photos that parents want to make sure they get, too. They want the one of everyone smiling at the camera. Make sure you get that photo and get it early.
Sometimes the kids won't cooperate even for the first posed photo. This will stress the parents out–it certainly has stressed me out when I've attempted family photos with my kids. Make sure the parents try their best to continue to look at the camera, not their kids. More often than not, there will be two or three shutter clicks when the kid will look. It's a shame when the parent is staring down in distress instead of looking at the camera. For the early poses, even if it is a moment of stress, tell the parents to look at the camera no matter what. (And if the kid is really not cooperating, just get up and say, “We’ll get one in a few minutes. Let's explore.”)

When it comes to posing instructions and help, I don't do much for families. Kids don't really listen, anyway. However, there are five small things that I look for and help with:
1. Close the gaps. Tell parents and kids to scoot together. Make hips touch. Put inside arms around backs. I used to think photographers told people to get closer so that they'd all fit in the frame. More often than not, I tell people to get closer because the photo looks better when they are touching. Families love each other, right? A physical touch conveys intimacy and love. Close the empty space between bodies and make them touch.
2. Put little kids on laps. This will tighten the shot and give opportunities for kisses, tickles, hugs, and whatever other silliness you can have a family do during formal poses. If you're not sitting, then get the kids off of the ground and into parent arms. For little ones, this is a no-brainer. When the kids are just a little too big to be held, that's when the real fun can begin. When the family has to do something they think they've outgrown, like carrying an older child or doing a piggy-back for the first time in years, you can get great smiles and laughs.
3. Watch the hands. Make sure hands aren't in odd places, especially with babies and other kids being held and carried. Pockets are a good place for hands to rest for the unsure dad of the group. Holding hands is good, too. Be careful where hands are placed in relation to the heads of little kids. Adult hands can look as big as a baby's head, so be careful that a hand doesn't compete with a head.
4. Check for diapers and closed legs. Little kids do not care how their legs are positioned in photos. You will, though, when the perfect portrait is ruined by unfortunate leg positioning.
5. Whether sitting or standing, try your best to get heads on the same plane. If someone is too far forward or backward, then you might run the risk of someone being out of focus. You don't need everyone shoulder-to-shoulder, but get them close; otherwise, make sure to consider stopping down your aperture to get a deeper depth-of-field.
If you're doing individual photos of young kids, make sure parents stand right behind you, not off to the side. Have parents sing and make noises, but make sure they're right behind you. That way, the child’s eyes will be aimed at your camera. If you're on the ground, the parents need to be low, too. Pay attention to where the kids are looking. If they're not looking at you, chance are that you need to tell the parents to change positions to directly behind you. (In fact, have the parent point right above the lens. The kid might stare right into the camera!) If you want something more candid, have the parents leave for a minute and see what the kid does. As long as the kid isn't an infant, you should be able to have a little adventure and get more natural photos.
If you do your poses quickly and early, you won’t need to go crazy making noises or waving toys. You'll get the smiles and be ready to move on.
5. Don’t stop moving

If you're photographing little kids, they won’t let you stop moving anyway. Don't expect to be able to sit and adjust a pose for more than 20 seconds. Tell them to hug or tickle or kiss on the cheek and click away.
Then get up and walk to another spot. Have them pick flowers or throw leaves or climb a tree. If it's safe, find water–a stream or pond or tiny waterfall–and have them look into a reflection or examine what's below the surface. Have them interact with the location. If the parents play along, you'll get amazing candid shots of everyone.
Continuing to move will also give variety to your photos. While this might make your job in post-processing more difficult (adjusting multiple exposures and different white balances), it's worth it for the variation.
Finally, fifteen or twenty minutes of moving might release everyone's energy and tension, which might give you the opportunity to try a posed photo much later in the session.
Follow the kids’ lead and just snap away. Happy kids will make everyone’s life easier. And even if the photos aren't perfect, the parents will be grateful that no one is crying.
6. Take breaks and eat snacks
There might be a moment about twenty-five minutes into your family shoot that goes something like this:
“Smile, Connor, look at the camera.”
“No!”
“Connor, love, just one more smile, for Mommy, please.”
“NO!”
“Remember I said we'd get ice cream if you smile?”
“I HATE ICE CREAM! NO!”
Through gritted-yet-smiling teeth: “Connor, Mommy and Daddy paid a lot of money for our family pictures. Keep smiling, please. Remember, ice cream…!”
“AARRRGGGGGHH!”
Don't let this moment happen.
You have to be fully aware of which kid is fading fast and suggest a break before one is really needed. This break will be for the parents as much as the kids. This first break will go especially well if you reminded them in an email a few days prior to bring snacks and drinks. This little tip to my families has saved many sessions from becoming epic failures.
(Quick tip: small snacks that don't make crumbs are the best. Pieces of fruit, fruit snacks, trail mix, and the like can be eaten quickly and won't smear all over faces. Cookies, especially Oreos, can make a big mess. Crumbs will be everywhere–faces, fingers, outfits–and for whatever reason, kids tend to savor eating an Oreo, so the break might take forever.)
What's great about a break is that it's a great time for candid or details shots. Take this opportunity as the family lets their guard down to keep shooting. Don't break with them. Well, break a little at first so that the stress of the moment is released, but then get back to work.

Depending on the family and your rapport, the break may also be a good time to take one kid separately to “explore” and get some individual photos. This should probably be with the one who wasn't on the verge of a meltdown. By separating from the group, not only will you get more honesty in the child’s face, but the near-meltdown sibling will probably do a quick reversal of attitude when the attention has shifted to their sibling.
That's a technique I use throughout: give attention to one kid in order to make an uncooperative kid jealous. I know, it sounds evil and manipulative. But it works. I have two kids under the age of three. If one is getting attention, the other wants it, too. Play the game of shifting attention. (“Okay, I guess Rosa and I are just going to go look at these flowers for a minute. We'll see you later, Connor…”) Being purposeful with your attention can really work to your advantage, especially if you look like you're having fun.
After a decent break, you might be able to try for a few more poses. Maybe. Chances are, you need to move on from poses for good–tell the parents that you got good stuff early. Now it's time for some fun.
7. Let them play
While this will clearly apply to families with little kids, hopefully you know your client well enough that you could have just about any age play for a while. Maybe they're a sports family–have them wear jerseys and play ball. Maybe they're all big readers–have them bring books and be silly reading.
No matter what, with little kids, they will need to play for the last part of your session. Have the parents sing their favorite songs or read favorite books to their kids. Play hide-and-seek or tag or swing on a nearby playground. Tell the parents ahead of time to bring a few toys to play with–balls, trucks, scooters, bubbles, whatever. Get everyone moving in a way that keeps them comfortable and happy.
Beware: don't do this step too early! Once it's playtime, there's no going back. Also, be careful of too much activity. You might end up color-correcting a bunch of rosy-red cheeks if things get too active.
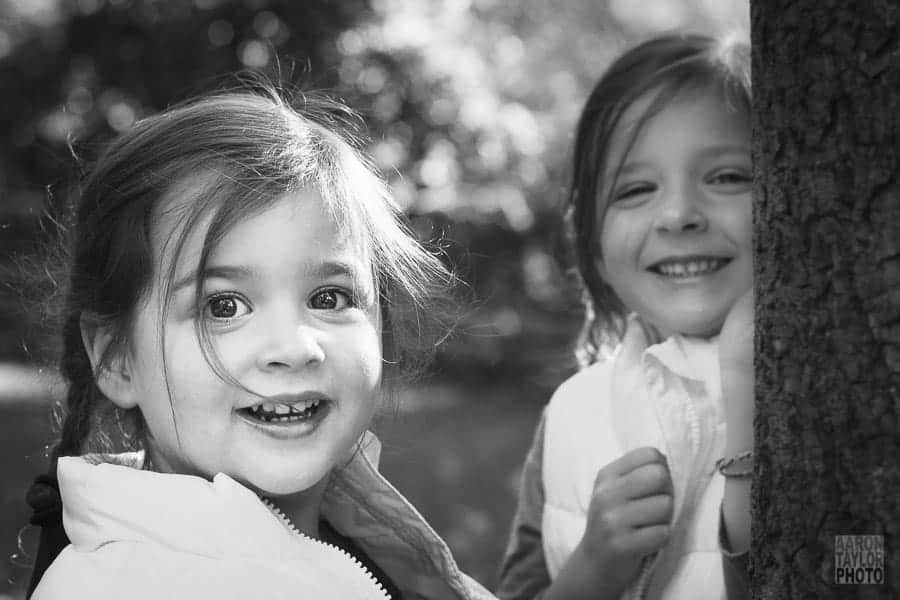
Something else to consider as you reach the 40-minute mark is having siblings play tricks on each other. Give “secret instructions” to one sibling to stand behind you and make a funny face at the other when you count to three. Or tell one sibling to be a monkey and see how the others react. Photographing the reactions could yield some natural smiles and laughs–or maybe some raised eyebrows!
Or you could try rapid-fire funny faces. Tell them to do a new silly face for each number as you count to ten. Or give piggy-back rides, especially if they're past the age when that's acceptable–that can be pretty hilarious to watch!
Whatever you do during the later part of the hour, have the family play and interact with each other. Keep them close, and you'll have great photos.
8. Don’t be afraid to end early
If everyone is fading, don't hesitate to end early. Start the trek back to your cars, trust in your skills, and know that you got great photos earlier. Reassure your client by saying, “There's great stuff here. Trust me. You all look great, and the photos do, too.” Snap a few walking photos as you head back. Ending a session before it becomes painful with little ones will help everyone's stress level. If you did your job quickly early on, you'll be fine.
Also, with kids of any age (even teenagers), end with a high-five. There’s something about a high-five that makes everyone happy.
9. Upload and send a preview that day
Okay, this is another tip not during the hour session, but it's a good one. Families want to share photos with everyone. Facebook has basically become a place to show off the great stuff your family is doing. Allow you clients to share as soon as possible. Email a few favorite photos that day, before dinner if you can. That way, when everyone is on the couch after dinner, staring at their screens, your client can have an optimal audience for sharing their amazing photos.
Make sure to also put preview photos on your Facebook page and tag the client. Once their family and friends start liking the photos, send invites to Like your photo page. You will see a spike in Likes. That means more exposure and probably another job or two.
And that's how you do it! The one-hour family session from start to finish. Yes, the process here actually took almost 24 hours from prep to preview post. But each step is well worth the effort.
You've made great memories for this family. Feel good knowing that your work will be on a wall or in an album for generations to come.

Great tips here Aaron. Most of it applies to families with little kids but thanks for sharing.
Most of my portraits sessions are for friends and family. My pet peeve is parents who spend the entire session trying to get their kids to look into the camera while they themselves are staring down at the kid. I have found not good solution to that one … yet. Thank goodness most of them are now in middle school and high school. Getting them to look at the camera isn’t the problem anymore. It’s getting them to put the smartphone down and smile for the camera.
I totally agree on all accounts. I have to constantly remind parents to just look at the camera. I’ll get their kids’ attention. And as a high school teacher, I battle every day with distracted cell phone use! It’s crazy…
Khurt- I know what you mean! I tell them first and foremost before I shoot, to always be ready for the picture. I say…”I’ll get their attention…no matter what, just keep looking at me and smile!” and I explain to them why I do that….and how the kids will finally look at me but then the parents are looking at them trying to get them to look at me. LOL. It seems to work about 90% of the time. I do have to remind them once or twice during the session when I catch them reverting back to it.
Great tips here. I’m definitely saving this in evernote. I’m reminded of what Nick Page said about photographing children—that it quickly becomes more like wildlife photography than a photoshoot. You definitely get better photos that way!
You do great work, Aaron. I’m definitely bookmarking this article for future reference.
Valuable information to be sure! Thank you for writing this for those of us who want to create better family portraits. Having a plan in place can only be a good thing..
Awesome article Aaron. I feel like not only great tips for photographers but also helpful for parents preparing for a photography session. It can be so stressful for all!! You do an amazing job with little kids, all great tips!
Fantastic article, Aaron! Great practical advice!
Thanks for all of the kudos, everyone! I’m glad this resonated as valuable to so many readers.
Thank you for these wonderful tips! I’m an hobby photographer but through word of mouth I have got some interest in family photography (SO NERVOUS) because of the kids! But I think if I implement some your incredible tips I will be successful! My first family are my cousins (thank goodness) so I will at least have a little bit of practice under my belt. Thank you again!!
Great article but I think I disagree that this is the only way to define a Lifestyle photo. I’m not a pro, so this is just my opinion. If I hired a group of complete strangers to make a fake family and took those exact same photos would that change the definition of the photo itself? I’m not disagreeing with your guide on how to make one for a family as a client, that’s all great.