Learn the fundamentals, and you form the foundation for further growth. In learning lighting for portraiture, understanding three-point lighting is crucial to making good portraits and then expanding into more sophisticated lighting setups.
What is Three-Point Lighting?
As the name would suggest, three-point lighting is a way of lighting a subject such that the light comes from three different directions. The size, distance, intensity, and position of the light sources control how the light falls on the subject, where the shadows fall, and how “hard” or “soft” those shadows may be. Before getting into how to set up three-point lighting, let’s look at these four basics.
-
Source Size and its Effect on Shadow Softness
The size of a light source relative to the subject size will dictate how “hard”, (shadows with sharp, distinctive edges), or “soft” (shadows with smooth feathered edges) will be. Though the sun is huge, its relative size in the sky on a cloudless day is quite small, a pinpoint source of light relative to a person posing for a photo. Thus the shadows on such a day will be hard, with distinct edges. On an overcast day, the entire sky becomes the light source and so shadows will be very soft, sometimes barely perceptible.
The same concept applies to artificial light. Use a flash with no light modifier (such as an umbrella, softbox, or other diffusion), and the light source of the flash is small relative to the subject. Shadows will be hard and the lighting harsh. Put a “modifier”, (a term for any device put between the light source and the subject designed to make that source different), between the source and the subject, and we change the relative size of the source to the subject making it “bigger” and thus the shadows softer.
-
Distance and Shadow Softness
The distance of the light source to the subject will also affect shadow softness. This is for the same reason as the relative size condition just discussed. Put the source closer to the subject and the shadows will be softer. Pull it back and the relative size to the subject is less, thus the shadows are harder. At first, this seems counter-intuitive. It would seem that if the light was harsh and shadows hard we would want to pull it further away from our subject. Just the opposite is true.
-
Intensity of the Light source
The term we typically use for the intensity of a light source is “brightness.” This is measured in lumens and is what light meters measure. Most artificial light sources used by photographers, (portable flashes, studio strobes, LED lights, fluorescent lights, and incandescent lights) have methods of controlling the output intensity.
-
Position of the Light Source(s)
Where lights are positioned relative to the position of the subject and the camera will dictate where the shadows fall. This combined with the three other light factors; source size, distance, and intensity will control the overall look of the light and how it falls on the subject. Getting back to the foundational lighting set-up, three-point lighting, let’s look at the standard position of lights used.
If you are an Improve Photography Plus subscriber, Jim Harmer discusses these concepts with excellent demonstrations in his Lighting in a Flash Workshop.
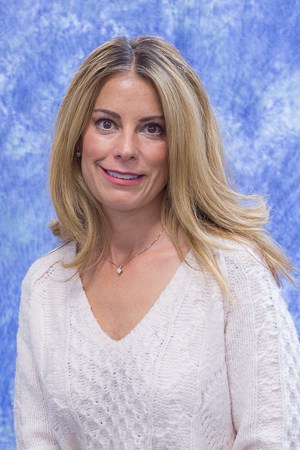
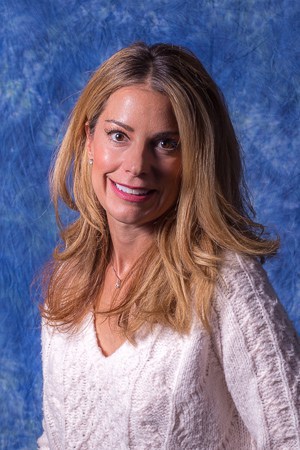
The Key Light
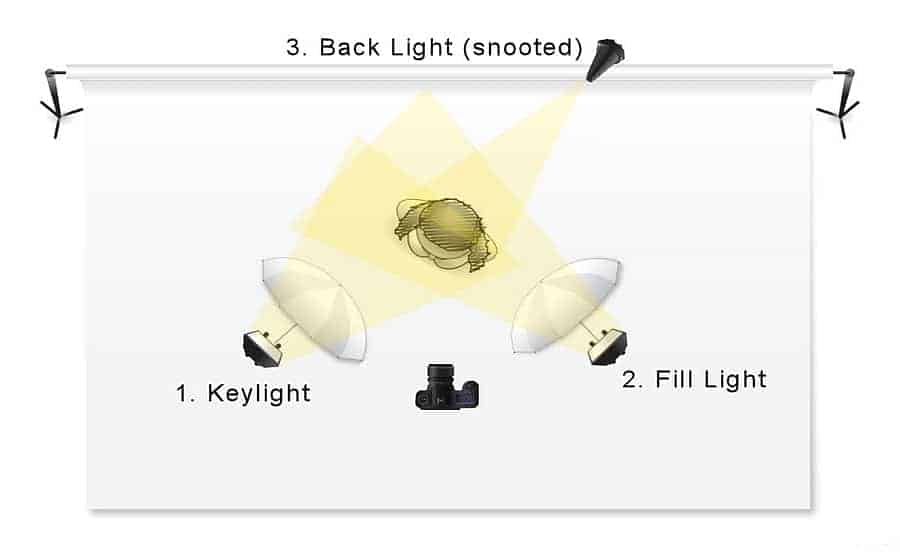
The Key Light is the main light on the subject. If we were to draw a line between the view of the camera and the subject, the key light is usually placed at a 45-degree angle to the camera. (See diagram below). Here the Key light is at camera left, but this is not mandatory. Usually, the key light will be the brightest light in a three-point lighting set-up. In portraiture, it is usually placed slightly above the model’s eye level angling down.
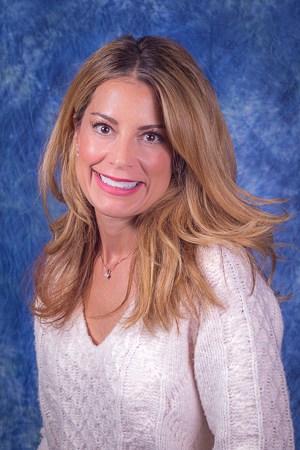
The Fill Light
The Fill Light usually mirrors the position of the Key Light on the opposite side of the camera. Its job is to fill in the shadows on the opposite side of the model’s face cast by the Key Light. It often is slightly less intense than the key light. How much less is called the “lighting ratio.” A 1:1 ratio would mean key and fill would be at the same intensity. Typically portrait photographers will use between a 2:1 and 4:1 lighting ratio, meaning the Key Light would be twice or four times as bright as the Fill Light. Usually, you will want a lower ratio when you want to have a smoother, evenly lit look on the subject. But if you are looking for a more textured edgy look, a higher ratio might do the trick. The Fill Light is often placed slightly lower than the Key light, (about level with the subject’s face) to help fill-in shadows under the eyes, nose, and chin.
The Back Light
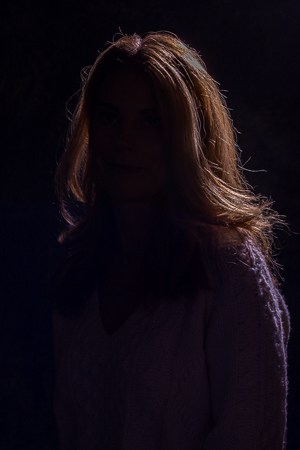
This light goes by different names (rim, hair, or shoulder light being a few). It is typically placed opposite of the key light pointed toward the back of the model. Its job is to put a rim of light on the model’s head and shoulders creating an outline around the model to create separation between them and the background and creating depth. Often this light does not fall on the front (camera side) of the model at all.
Types of Lights and Modifiers
The kinds of lights are used and with what modifiers varies greatly. There is no single choice that is best, it will often depend on the look desired, the space one will be shooting in, what degree of portability is required, and not infrequently, the photographers budget. From studio strobes to Speedlights, LED lights to cheap incandescent bulbs, the three-point lighting concepts are the same regardless of the type of lighting used. For the purpose of this article, I will discuss using portable flashes (Speedlights). I am most familiar with this equipment and also what I would guess most readers will start with.
Manual vs TTL Flash
If your previous experience with flash is using the pop-up camera flash or maybe a flash unit mounted in the hotshoe of your camera, you’ve been using the TTL (Through-The-Lens) feature of your camera to calculate the flash exposure. (Canon calls this ETTL, Nikon ITTL). This automated method causes a “pre-flash” to fire, the camera to calculate flash power output needed for proper exposure and then fire the flash at that power setting. It’s automatic and usually does a good job. More sophisticated (and expensive) flash triggers support TTL and can be quite useful. For the purposes of this illustration however, I’ll be discussing the use of a fully manual setup using the Manual Mode on the camera and manually setting the power output on each flash. The advantage of this set-up is less expensive equipment and consistency from shot to shot.
Standard set-up
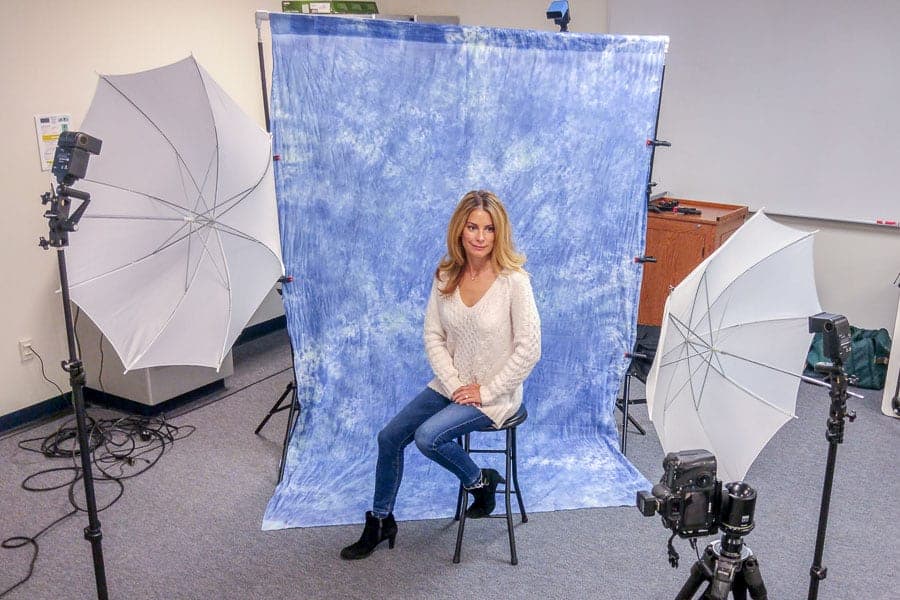
For the purposes of instruction here I set up the “textbook” three-point lighting set-up. My camera on a tripod was placed about 8-feet from my model, who sat on a stool. She was turned at about 45-degrees to the camera with her head rotated to look directly at the camera. The camera was at her eye level. For a background, I’d suspended a Cowboy Studio photo backdrop on a rod between two large light stands. The Key and Fill Lights were two Sunpak Auto 383 Super manual flashes, old units purchased used from E-Bay years ago (when I was just starting with portrait flash work). The sliding power switch on the back of these units makes setting power output easy and visible.
The Key light was placed on a light stand at camera left, angled 45-degrees toward the model and slightly higher than her head pointed down. The modifier was a 36” white shoot-through umbrella. (Bought cheap, I now wish I’d purchased larger ones). The Fill Light was the same equipment, placed at camera right and angled 45-degrees toward the model and at about her eye level, slightly lower than the Key Light.
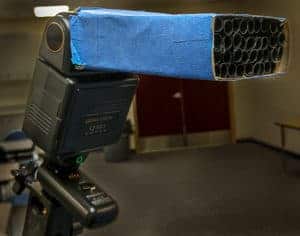
The Backlight, another Sunpak, was placed on a light stand behind the backdrop helping to hide it from the camera view. The flash peeked over the top of the backdrop and was angled sharply down so it pointed at the back of the model’s head and shoulders. I outfitted it with a home-built “gridded snoot” so that it kept the light on the model only and put no flare in the camera lens.

Camera Adjustments and Settings
Under each flash was a Yongnuo 602C wireless receiver with the transmitter in the camera hotshoe. As mentioned, I’ve had this for several years now. Was I buying today, the flash equipment discussed by Jeff Harmon in this Photo Taco episode would be what I’d get, just as simple and not appreciably more expensive.
The camera (Canon 6D) settings were –
- ISO 200, (I find increasing this just slightly higher than the base ISO 100 allows me to keep flash power down a bit and thus lets flashes recycle faster.)
- 1/80 second shutter speed. The flash will control the lighting on your subject, the shutter speed is best used to adjust for the ambient light and to adjust how much you want your background to show.
- Aperture – f/8. I was using the Canon “nifty-fifty”, the 50mm f/1.8 prime lens. I will often use this lens for portraits as it is very sharp and in the smaller spaces I often must shoot, is about the right focal length. Usually, I am not shooting for print, and so cropping isn’t a problem. With this fixed focal length lens, the camera and stool for the model are positioned and I don’t move either one, keeping the distance between camera and model always the same. That way if I’m shooting multiple people, framing will be the same for all shots.
Setting the flash units
- I take a shot with no flashes on to determine how much ambient light is being picked up. Often if I’m shooting in an office space I will not need to turn off many of the existing lights as they don’t affect the shot. If I need to, I increase the shutter speed to darken the ambient effect.
- I then have the model, (or a fill-in test subject) take a seat. I take a shot with just the Back Light flash on. I’m looking for proper positioning so the light puts the rim of light on the back of her head and shoulders. Brightness is controlled with the power output switch on the flash.
- I next test the Key Light. I’m checking positioning to determine if I like the angle and height of the light and the amount of softness. If I need to, I may move the light closer when practical. I adjust power to get a good exposure. I’m controlling exposure with flash power output, not camera controls.
- Finally, I turn on the Fill Light flash. I’m looking at positioning to properly fill in the shadows cast by the Key Light as well as distance for softness. I try to keep the power a click or two under that of the key light, (so if the Key is at ½ power I may set the Fill at ¼ power for example.) This would be a 2:1 lighting ratio.
With all flashes on I will make few shots to verify all is to my liking, making any final adjustments as necessary. Once satisfied, so long as the model and camera stay in the same relative locations, I can make all the shots I like. If I find I need to slightly tweak exposure I will typically do this with small adjustments to the aperture.
A Practical Example
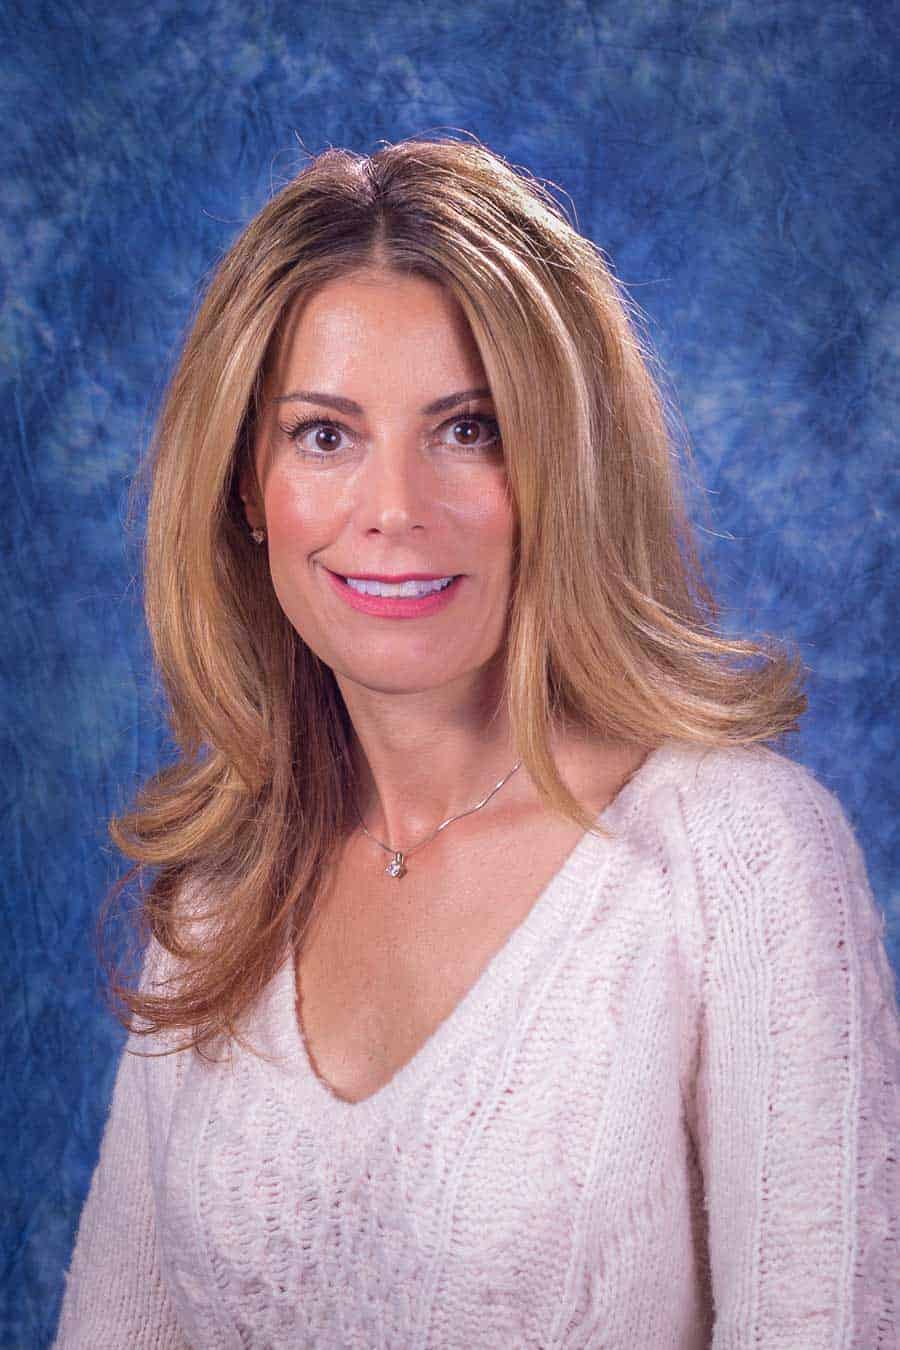
The Assignment – Produce photos of all officers and civilian employees of the Idaho State Police to be used in their 75th Anniversary Yearbook. In this style of a book, it is important that all of the shots look very similar, head-size in the frame be equal and lighting be the same. My challenge: Photograph almost 600 people, typically taking three shots of each person. That meant some 1,800 photos! To add to the fun, I needed to shoot the photos in six regional offices spread across the state and do it over several weeks in three different sessions. Keeping my equipment compact, portable, and easily set-up and taken down with minimal time was also important. The simple three-flash set-up I show in this article was exactly how I did the project. It worked great for this and I have continued to use it for many corporate headshot-type portraits since. Adjusting the flash positions and settings, I have also made small group portraits.
Variations on the theme
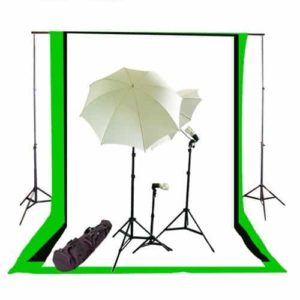
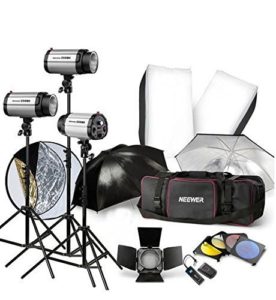
If you have noticed, I have used the qualifying words “usually,” “often,” “sometimes,” and “if” quite a bit through this article. That's because while three-point lighting is a basic and foundational method of portrait lighting, there is no single or even “right” way to do it. The types of lights you have, where you position them, what modifiers you use, and most importantly – the look you are trying to achieve will all influence how you light your subject. Moving lights to different positions, trying a key light only, or perhaps substituting a reflector for a fill light are all possibilities. Adding a fourth Background Light or perhaps colored gels are frequently used techniques. What can be achieved is really limited only by your imagination.
Just do it!
If you've been considering portrait photography, start small and grow your kit as you learn. Outdoors, the sun can be your Key Light and a reflector your fill. Or put your subject with their back to the sun and let it be the Hair Light using reflectors as your Key and Fill. Indoors, a single flash on a cord to get it off the camera becomes your Key Light and a reflector your Fill. There's no reason not to dive in if you have a willing subject to pose for you.
A willing subject
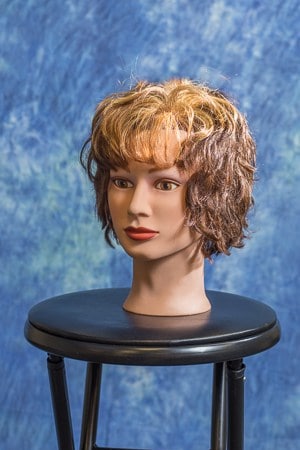
When learning lighting, finding a willing and patient subject who will sit there while you play with lighting, working to get things just right isn't always easy. I found the solution to that at a local beauty college. They were willing to give me, (for free!) a mannequin head students had used to practice hair and makeup techniques. Apparently, they had a bin of these they were going to dispose of. “She” is the perfect subject for practicing lighting, working cheap and never complaining. I also never need a model release. A perfect way to, (ahem), get “a-head” with my portrait lighting techniques.

What a insightful article. I sure learned a lot from you! Thank you for being such an excellent teacher! You make it easier for me to understand.
I just thought I’d add that Pete LaGregor’s article on Rembrandt Lighting makes a nice compliment to my article. Go give it a read! – https://improvephotography.top/50146/rembrandt-triangle-beginners-guide/
Thanks man. Much appreciated. I’m going to put a link in my article to this one as well.
You have a real talent for breaking a subject down into simple components, and making each step clear. Thanks for a providing a great resource.
Thank you! A lot of concepts simply explained with application included. Really great and super helpful.
Thanks Grant. Glad to help. I’m a relatively new writer on IP and I hope you’ll watch for my other upcoming articles.
Excellent work Rick. You are getting pretty good at this. Keep it up. Max
Excellent article that helps make lighting, etc, easier. Very well written & explained. Great Job…
Thus us probably the best article I have ever read which breaks down and explains the process of what to do and why. Not too much and not too little. The ‘goldilocks’ explanation and all in one place. Thank you!
Thanks for the info. I have a small studio and a basic 3 strobelight (Interfit) set up, which I set off using wireless trigger attached to my camera. I seem to be able to do well with the set up. However, if I wanted to add a fourth light which would include my SB-800 Nikon flash, how would I be able to set it up so that it synchronizes with the other 3 strobes?
I know how to use the SB-800 off camera by itself, but if I wanted to add this flash to the other 3 how would I do this.
Thank You
Been hoping to enhance my studio work but I only really do it once a year for the kids school picture since I hate what they bring home from school. Going to add 3 point lighting this year. Thanks for the advice.
What is Three-Point Lighting?
When you start to play this game then firstly you have to get download and if you don’t want to download then you can play this game i online also but you can’t save in online if you suddenly quit the game.