As every digital photographer begins to advance, they quickly realize that there are two halves to creating epic modern images. The first half of the process is learning to master your camera, the controls, and the understanding of capturing of light with that tool. The second half is learning how to take the files that you get from your camera, and turning them into an amazing final edited version. This article will focus on one amazing resource for learning incredible post-processing techniques for your landscape photos.
The information in this article comes almost exclusively from the resources found at www.improvephotographyplus.com, in the training section. This is not a paid advertisement. This is one part homage, one part respect, and one huge part admiration for the training materials found over on Improve Photography Plus (IP+).
If you are fairly new to post processing photos, I strongly recommend the Photoshop 101 and Photoshop 102 courses that is also available at IP+. These videos explain how to use each of the various tools, how to navigate confidently through Photoshop, and basically get you familiar with fundamental Photoshop skills. Advanced techniques all build off of the assumption that you have a good solid command of basic techniques. In my own personal journey, I think I have often made the mistake of trying to move on to the complexities before truly having an in depth mastery of the basic tools. So learn from my mistake, and make sure you have a comfortable working knowledge of Photoshop, and then dig in to the advanced stuff.
I'm going to outline the basic ideas and concepts behind a number of advanced techniques here, but this is absolutely NOT a suitable substitute for using these training resources. In fact, while mapping out my thoughts for this article, it soon became painfully obvious that no written instruction manual could give you the same clarity of understanding as the professionally produced video training units presented by Jim Harmer and Nick Page. Watching these master photographers work in Photoshop (and also in Lightroom) sinks in so much more deeply than reading a written set of directions.
Without further ado, here are a several of the techniques that you will master with a bit of practice and repetition. These are truly presented in no particular order. Do not feel like you need to study these in a given order. The beauty of learning through IP+ is that the resources are all there permanently. They don't remove the older videos, they leave them all there so that individuals can come to them at their own pace. What I recommend is picking some particular skill or technique, and drill it down! Become extremely confident in that one thing, rather than dabbling in it for a moment, then jumping to something else. The better you master each thing before moving on to something new, the more it will stick with you.
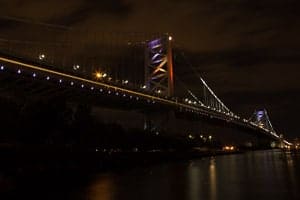
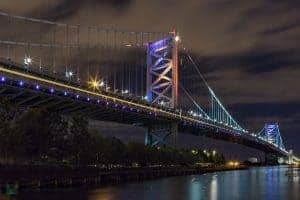
Luminosity Masks
Probably the best place to start learning about Luminosity Masks is the video Managing Dynamic Range with Luminosity Masks. HDR, or High Dynamic Range has gotten a bad wrap because of the very cartoonish application and extremely unrealistic images that were a major fad a number of years ago. I plead guilty to having an entire assortment of these very dated and stylized images on my hard drives. Don't confuse HDR with a tasteful use of the principles that HDR photography is based upon.
The main idea with High Dynamic Range is to help process a photograph in a manner that more closely mimics the way your eyes actually process the various degrees of light-ness and dark-ness in a scene. When you look at a scene with your eyes, you can see in the shadowy areas, your eyes can pick out all of the detail and texture in the shadows. Then, as you look at a bright object, your eyes quickly adjust and you can see the texture and detail there, as well. Camera sensors have limitations in how they register that disparity between the lightest areas and the darkest ones. Great new sensors have made improvements, but they are still technically far less ‘flexible' than a human eye that is connected to a brain.
With Luminosity Masks, you are essentially selecting areas of your photograph based on their relative brightness levels. I personally use Lumenzia, by Greg Benz. That is just one of the many Luminosity Masking utilities available for Photoshop. Nick Page uses RAYA Pro. There is also another option, TK Actions. As of the writing of this article Nick is actually preparing a very detailed head-to-head analysis of the various utilities that facilitate Luminosity Masking. It's worth mentioning that everything that is done by these plug-ins can also be done by hand, using actions in Photoshop. It isn't absolutely necessary to use one of the plug-ins, but they are incredibly powerful. Just as a reference, using Nick's video with RAYA Pro, I was immediately able to apply the techniques using Lumenzia. They are slightly different, but not so much so that you can't very quickly adapt.
Once you begin functioning with Luminosity Masks, I predict that you will find them irresistible. They are wildly powerful for selecting and modifying areas of a photo. Using them very quickly “levels up” your photo editing results very rapidly.
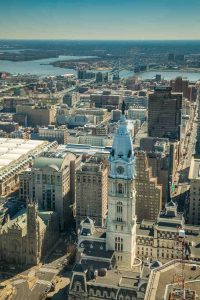
Focus Stacking
The essence of this technique is to focus on different areas for maximum sharpness, then stack those images together so that you have sharp focus throughout your final image. The example found in this tutorial video is the famous Mesa Arch. One set of photos is focused on the arch itself, which is only a foot or two away from the camera. Then there is the canyon that is off at a great distance, being framed by that arch. Nick's video shows a combination of both HDR processing and Focus Stacking, in order to get an amazing final result. The video is titled “Focus Stacking from Start to Finish.” Don't be intimidated, it's actually not as frightening as it sounds.
Focal Length Blending
This technique is used to counteract an unwanted side effect of using a very wide angle lens. In landscape photography, you are generally looking for a compelling foreground image. Let's use the example of a patch of flowers, or a funky looking rock in the foreground. Then off in the distance is a huge mountain. When you take the photo using your wide angle lens, your foreground will look immense, because it is so close to your lens. Unfortunately the massive mountain off in the distance ends up looking flattened out and tiny.
Focal length blending involves taking your shot at more than one focal length, then combining those two shots in a believable way in Photoshop. The example in Nick's video is a rock formation in the foreground and a large mountain in the background. Watching him merge the two images into one is nothing short of amazing. It's a wonderful way to understand the concept and the artful application of the techniques to create a flawless end result.
HDR Panoramas
In Nick's Advanced Techniques for Landscapes he devotes two separate videos to the process of capturing and editing an HDR panorama. The first video is devoted to the capturing process. He shows how to set your tripod and how to capture your bracketed shots in a deliberate way to have the ideal raw materials with which to composite an HDR Pano.
The second video shows in tremendous detail exactly how to first combine the individual HDR shots (SUPER easy in Lightroom.) Then it shows how to take those merged photos, stitch together your panorama, then how to edit virtual copies of the finished panorama, to have the perfectly edited sky along with the perfectly edited foreground.
The Orton Effect
A number of Nick Page's videos include an explanation of this simple yet very powerful effect. It involves creating a duplicate layer where you use gaussian blur and then apply that very subtly as a layer in your image. It creates a ‘radiant glow' in your image that really adds an extra something “special” to a landscape. This is very easy to overdo. That is true of just about any of the effects described in the videos. In fact, one of the most valuable aspects of the tutorials is that Nick explains precisely how he makes his artistic decisions as far as what is enough vs. too much of an effect. You are watching not only the technical side of the process, but also the artistic side as well.
Dodging and Burning
In all fairness, perhaps Dodging and Burning is something that is probably attempted by folks when they are in the “intermediate” phase of post-processing. It isn't esoteric or highly unusual or advanced. What is especially helpful about watching Nick's application of this technique in his Advanced Techniques video is again more the artistic thought process than the actual technique of doing the dodge or burn. For anyone who isn't familiar with Dodging and Burning, it's basically the notion of painting in enhancements of the lighter areas and darker areas in a photo. In the old darkroom days it was done with the enlarger, and often “masks” that were created to cover up a portion of the image as the enlarger was exposing the silver particles in your paper. Now it's done primarily with adjustment brushes, and for most purposes I have found that I use Luminosity Masks to manage the selection areas for this.
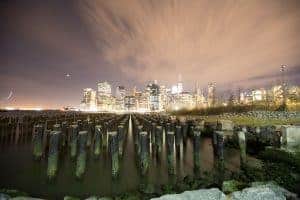
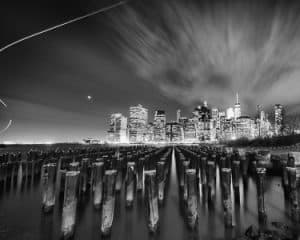
Night Sky Editing
The Night Sky editing video is actually something which I have on my “to do” list for this Summer (2017.) I live in the suburbs of Philadelphia, and due to the massive amount of light pollution in and around the East Coast cities, I have spent the vast majority of my night photography focused on illuminated bridges and landmarks. This Summer, I will be making a road trip to Colorado Springs to attend a Portrait Photography workshop with Connor Hibbs and Sandy Dorau. While making that trip, I have already blocked off a couple of nights to do Night Photography in Kansas or Colorado, much farther from the big city lights.
But for post processing purposes, I have studied Nick's Night Photography and Light Painting videos, and this information is incredibly valuable. You can see how much Nick loves this sort of editing, and just as in the other videos, he masterfully describes not only the way he is using Photoshop, but also the reasoning behind his artistic decisions.
Improve Photography Plus
The best advice I can possibly offer is to head over to www.improvephotographyplus.com and sign up for a membership. It's incredibly affordable, and you even get to start out with a free trial. I literally have learned 98% of my post-processing knowledge from the podcasts and these videos. Regardless of your current level of mastery, there is incredible value in both the technical and artistic advice. Enjoy!

Why not show a before and after?
Fantastic suggestion! I’ll add a few of the before photos – straight out of camera, no post-processing. Great idea!
I like how you stress the importance of learning the basics first. One error I’ve seen many people make is trying to go for the complex stuff before mastering the basics. I too was guilty of this but quickly realized it turned into frustration and sub par results.
Luminosity masks/selection will change the way you work on digital images. 99% of my final results have been touched with various techniques using them.
Great read 🙂
Great article Mark. Always nice to see some local photography!
When will the comparison of Raya Pro vs Lumenzia be available?
@Nicole Xu – I just chatted with Nick, and the comparison is still a couple of weeks away. There are a couple of updates right around the corner and he is going to do the comparison after those updates. It will probably go live in late April or early May. Thanks!!