In this article I will give you 9 tips on how to speed up working in Lightroom. Lightroom has gone through the hideously slow phase, and if you do all these things you will find, like I have, that editing in Lightroom is just fine these days. Do you want to speed up working in Lightroom? If you do please read on and try the things that you are not already doing and see what happens!
These are tips about working smarter and more efficiently, as well as organisational and hardware considerations.
A bit about me
I have been using Lightroom since version 1.0, and use Lightroom on a daily basis. I photograph buildings and their surrounding environments, and also nice places all over the world.
Are you new to Lightroom?
If you are new to Lightroom, and are wondering what it is all about, you might want to check out my article on Improve Photography An Introduction to Lightroom for New Photographers.
Here we go with my 9 tips.
1 – One catalogue
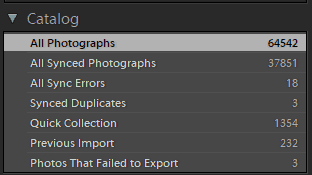
I have all my images in one catalogue.
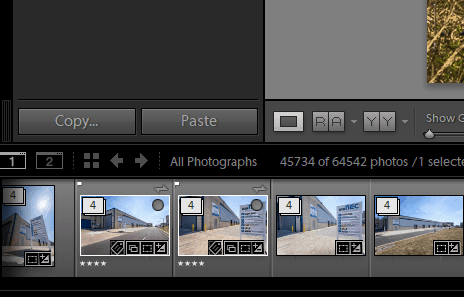
As you can see I have 64,542 images in this catalogue, and it works just fine. I have heard of photographers who have more than 1 million images in a single catalogue without any problems. Adobe have stated that they have not yet ascertained what the maximum size is of a single Lightroom Catalogue.
I have had problems (a long time ago) with images in more than one catalogue, but since moving to one catalogue I have never had any problems.
Use one catalogue and you never have problems with where images are, and backing up is as simple as it can be.
This will save you time now and in the future. If you have more than one catalogue I strongly advise you to merge all the catalogues into one. Please make sure you take backups before you begin this exercise and take notes and screen shots, so you know exactly what the contents are of each catalogue. Make sure that everything is in the new single catalogue, and once you are happy take a backup of this shiny new catalogue, and then at some point in the future get rid of the old unwanted catalogues.
And when I say some time later I will come back to this!
A nice easy one to start with – one Lightroom catalogue – sorted.
2 – File structure
I have spent quite a lot of time working on a logical file structure. It was not until I started to use Collections that I made sense of this.
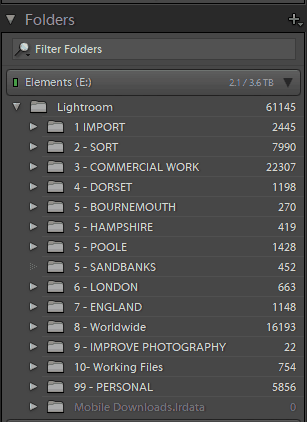
Here is how I have my folders and files organised.
These are the main folders
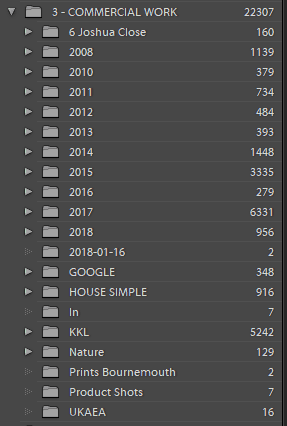
And these are the sub-folders for my commercial folder
And finally, this is how I organise the images for a locational shoot – this is my Santorini folder.
A few points to make here.
The actual images are not stored in Lightroom – they are stored in the Pictures folder on my PC.
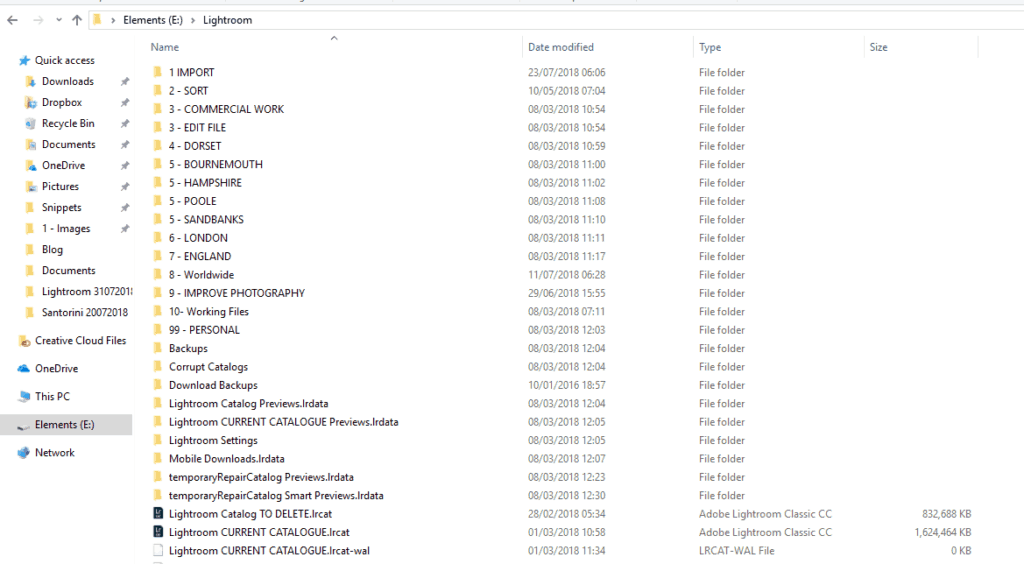
Here is the same structure in Windows Explorer.
You can see the Lightroom Catalogue named “Lightroom Catalog TO DELETE” – I have still not done this even though the new catalogue was created on the 1st March when I had a hard drive failure!
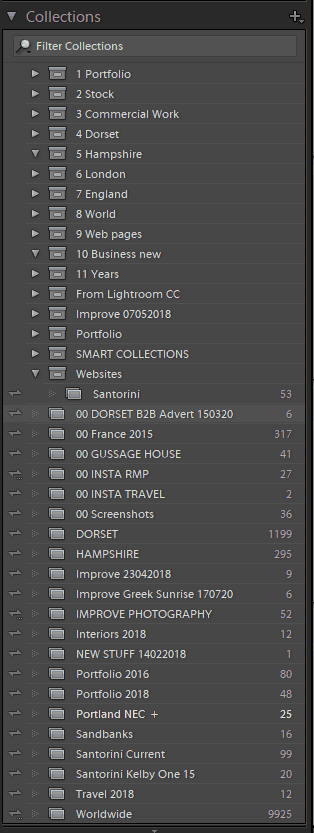
And these are my collections.
There is an element of reflecting the file structure here, and collections just thrown in to work with. Which is fine.
Where are my images then?
They are in the folders shown in Windows Explorer. The Lightroom Catalogue knows where the files are, and links to these images. Lightroom saves the changes to the images within the Lightroom Catalogue. If you were to open an image from the actual windows folder the edits would not be visible.
I treat the file structure and folders in Lightroom the same way I do with the rest of the stuff on my PC, using a conventional file structure.
This was my lightbulb moment – just because I was organising photos in Lightroom this did not need to be any different from what I have always done in Windows.
Collections take this a step further.
My collections are a lot less structured as you can see, – think of them as playlists that you add your favourite music to.
I create, use and delete collections all the time. They are folders that I use for whatever I am working on.
There are the two big differences between folders and collections.
1 – Collections sync with Lightroom Mobile – folders do not.
2 – Add images to a collection and they have not moved – they are added to the collection, but the images stay in the same place (folder). Move images from one folder to another and they are physically moved.
That is why I am less concerned about the organisation of my collections.
One last point – create all the folders and sub-folders you want in Lightroom – you can always view them in Windows Explorer if you want.
I organised my folders a few years ago now and have never needed to change the files structure – I just add new folders as and when needed to the file structure I have created.
3 – Import presets and settings
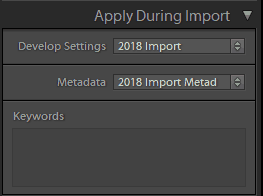
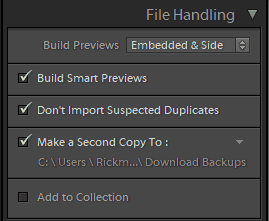
There are things that you can tell Lightroom to do on import that will speed your work up significantly. I add Develop and Import Presets – I have named them as you can see I had so many presets I was not sure which were the current ones!
Once these are selected in Lightroom they appear evry time you import images, so you don’t have to worry about them again.
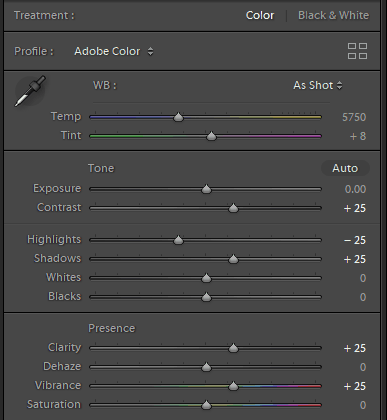
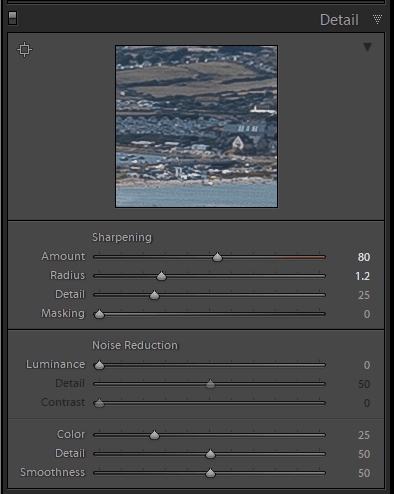
When I import images in to Lightroom I apply the following to each and every import.
Develop presets
Metadata presets
I also add copyright information to every image on import
And finally – very important – another thing to do before you import any images
Make sure that these are selected in the import dialogue box and you don’t need to worry about them again.
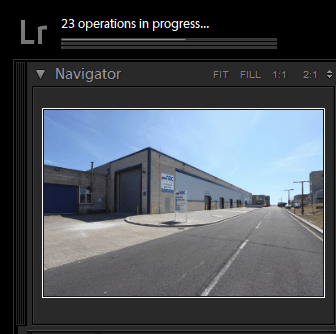
I know that giving Lightroom more things to do slows it down, so when I have started off an import I leave it to it and go and do something else, like have a beer. Once done I come back to Lightroom with all that good stuff done for me.
4 – Workflow
My workflow has evolved over the years. I now have a logical, consistent workflow that I follow for every commercial shoot. This not only saves me time but also ensures that I produce a consistent look and style of images.
I do grant myself more latitude for personal work, or work for specific uses, but my core commercial work follows this workflow.
I always work in the following order (after importing, filing and selecting the images)
- HDR Merge
- Crop
- Transform
- Basic panel
- HSL panel
- Effects panel
- Export
I wrote this down as a reference some years ago, and have modified this as and when Lightroom changes, or I find better ways of doing things.
5 – HDR Merge
Do you take HDR images? I do, and this is how I merge the image sets. This is another job I start Lightroom off doing then leave it to get on with it.
In this example I set Lightroom off creating 21 HDR merges the same time. I have never pushed this beyond 30 images, but one day I am going to try and see what the limit is with my PC.
This is how I do bulk HDR Merge in Lightroom. This has changed with the latest release of Lightroom, meaning that a couple of steps I used to do in the process are now done for me by Lightroom.
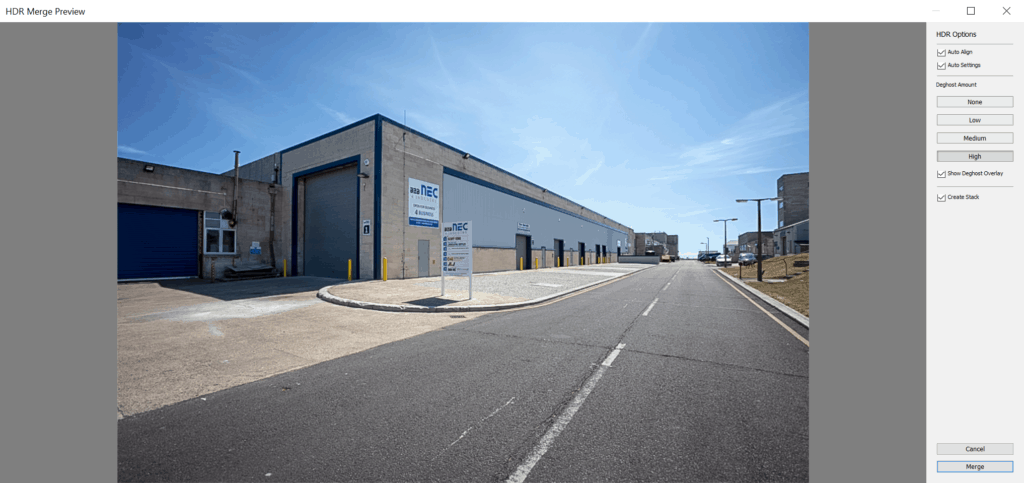
Firstly, I create a single HDR image by selecting the three images I have captured with auto-bracketing. In the Develop Module I select the three images, and use the shortcut Control H.
I normally use the settings shown.
Next, I create the HDR image, and if that is ok I can go through a set of images one by one.
This is the good bit.
Say I have 20 sets of three bracketed images that I want to create new HDR images from. In the Grid View select all these images, and then expand all the stacks.
Hit D to go to the Develop Module, select the next three images, hit Shift Control H, wait for the dialogue to pop up saying “Photo Merge added to tasks”, and once that box has disappeared move on to the next three images and do the same. You can repeat this as many times as you like – if I am working on 20 images I will do this to all 20 and then leave Lightroom to it – I go and have a cuppa or grab a beer (depending of course on the time of day).
When I come back there should be 20 stacks of 4 images with the new HDR image on top – sweet!
6 – Keyboard shortcuts
I love my Lightroom keyboard shortcuts
These are the ones I use the most
- G – grid view
- E – loupe view
- D – develop module
- Control H – open HDR Merge dialogue box
- Shift Control H – start an HDR
- Control A – select all images
- Control 0 – view full image
- R – select crop tool
- O – scroll through grid views in crop tool
- Control G – add images to a stack
- P – pick (white flag)
- U – unpick
- X – reject (black flag)
- Q – spot removal tool
- A – visual spots in spot removal tool
- B – brush
- L – lights out/ lights on again
And when you press the Alt key first you get a whole new world of possibilities!
I use keyboard shortcuts in Lightroom all the time – the list above is just the ones that spring to mind as I write this.
7 – Solo Mode – and other view related improvements
Fed up scrolling up and down through open panels? I suffered with this for years before I heard about solo mode.
With all the panels open there is a lot of scrolling up and down through the panels.
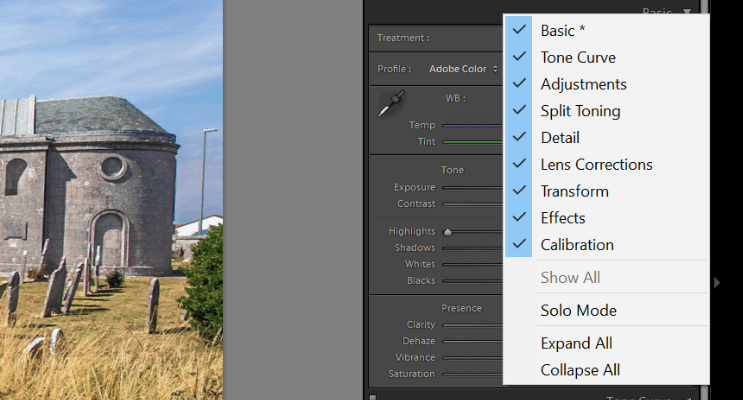
Right click on one of the panel description bars and look what pops up – solo mode.
Just click on Solo Mode and it will be ticked.
Now when you go from one panel to another in the develop module as soon as you open the new panel the old one closes – there is only one panel open at any one time. This might sound trivial, but this saves serious time and much less scrolling.
And on that subject, there are panels that I do not use, so I hide them. All the panels have a tick next to them. Right click to get the dialogue box up again, then click on the panel that you don’t want to see, the tick goes and it disappears from view!
And let’s take this one step further – go the menu top right. I only use the Library, Develop and Map modules normally, so I hide the rest.
Do these things and you have less scrolling around and less stuff getting in the way.
8 – Make sure you have enough RAM
I use a Dell laptop. Since I got my iPad my laptop has not left my office. Last year it really struggled with Lightroom and Photoshop. Now some of that was down to Adobe. And the rest was down to me.
My hard drives were cluttered with all sorts of junk, so I have had a big, systematic clean out of files on my hard drives.
And I had 8GB of RAM.
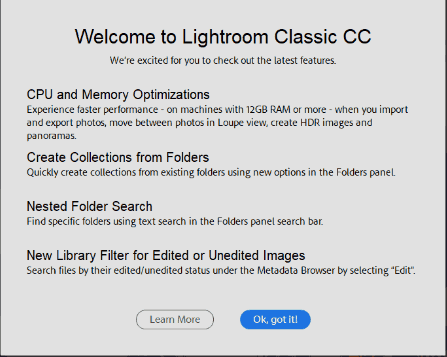
When Lightroom Classic upgrade 7.3 (I think) was released this was the welcome screen message.
This kind of forced my hand into getting some more RAM.
Now I have to tell you that the thought of installing new RAM into my computer filled me with dread but was actually completely painless.
I bought my memory from Crucial, who scan your PC to ascertain exactly what RAM you need. They did this, and the price was £130 delivered. I ordered the RAM and once it had arrived set aside a quiet morning to install the memory. It took me about 10 minutes to do and is one of the best buys kit wise that I have made in a long time – I have no idea how much time I have saved, or not lost sat waiting for Lightroom, but I have not regretted this upgrade once.
Upgrade to 16GB and watch how quick Lightroom really can be
And of course, this applies to Photoshop and everything else I do on my PC.
9 – Copy and paste
Copy and paste – here it is bottom left.
I have just used them one a commercial shoot. I had a photo with some plant and equipment outside the building, and then the same with the equipment gone and the roller shutter down.
I cannot show that image just yet which is a shame, but this is the point.
I edited the first image, which included a lot of spot removal on the roads and footpaths. Once done, I selected copy, checked the all box and pasted all the edits I had done to the other image and that was the image done.
You can do this with one, as many as you want or all adjustments to an image – an incredibly simple and powerful tool that is my last time saving tip in Lightroom.
Summary
One final point – to save even more time I recommend everyone checks out the Adobe tutorials, as well as the guidance provided not only by Improve Photography but other reputable websites – I wish I had done this a long time ago.
I hope that you have found these tips on how to work faster in Lightroom helpful. If you have any questions please put them in the comments box. I try to answer every question from our readers.
I would also love to hear from people who have tried out one, some or all these tips to see if they worked for you as well.



waooo thanks for share best software light room advantages. i like this software. my friend give me huge tips to use this software.
Thanks Rick, great article. Didn’t know the trick to line up multiple HDR merges! That will be a big help. Does it work for panoramas too I wonder? Bitten the bullet and upgrading RAM through Crucial as well.
Hi Ed
Thanks for your thoughts. The multiple HDR thing is great, especially with the extra RAM. I have not tried it on panoramas yet but will have a go at this in the autumn – I have a plan to do more panoramas.
Glad to hear you are upgrading the RAM – let me know what a difference it makes.
With kind regards
Rick
Thanks for your article! I have read through some similar topics! However, your post has given me a very special impression, unlike other posts. I hope you continue to have valuable articles like this or more to share with everyone!
Hi and thank you for your comments. You can find new things on Improve Photography most days so keep popping back to see what hew articles have been published.
With kind regards from England
Rick
I like this article, it’s great and detailed, thank you for sharing.
Hi and thank you very much for your kind comments.
With regards from England
Rick
Thanks for making this game when i have seen this game first time then i am really happy to see that because i loved to play the matching game and this game become more fast.