The use of social media in photography has become prevalent in recent years. Though most photographers now share their still images on social media, many are now taking it to the next level by sharing their knowledge and stories using video. So if you are thinking about putting yourself out there on YouTube, here are my 13 tips for making your channel a success.
Not that long ago, unless you were already on TV, your only audience was typically your friends and family when you showed them your latest home movie. With the advent of inexpensive video cameras (or cameras that shoot video), and the internet, anyone can have an audience. There are even some channels that now have audiences that would make some TV channels envious.
Though the hardware, tools, and platforms to create video are all very accessible, that doesn’t mean it’s easy to do. Like your stills photography, it requires effort, practice, and commitment. It’s all too easy to look at other YouTube channels with 10’s or 100’s of thousands of subscribers and think it’s easy. But, all these channels started with zero subscribers and had to work to get where they are.
So if you think you have what it takes to create a successful YouTube channel and you want to share your photography stories, tips, or even services, then read on to see what my top tips are. By the way, most of these tips also apply to other video sharing services such as Vimeo if you choose to go with a different platform.
1 – Start a Blog
I know, I can hear you all screaming at me asking why on earth would you write a blog when you want to create a YouTube channel. The simple fact is that creating video content is hard work, both in terms of presenting yourself on camera and learning the skills to edit video. That’s a lot to do on top of trying to also understand what the message of your channel is.
By starting a blog, you can build up your levels of commitment by producing regular written content. Without the added pressure of being on camera, and the processing of that video, you can use the written word as a way to develop what you and your channel might all be about.
Not all photography YouTube channels have blogs, so it’s not mandatory to have one. However, if you think you might want to create a channel and you’re not sure what you might talk about, a blog is a great way of testing and developing your message without the overhead of video.
2 – What’s Your Story or Selling Point
Not everyone who sets out to create a YouTube channel has an aim to get as many subscribers as they can. For many, just being able to share their stories or skills to a wider audience is reward enough. No matter if you will be happy with a few hundred subscribers or you want to 100,000 plus subscribers, your channel should have a clear goal.
If you’ve been blogging you might already know what that goal is, but if not, you need to think about what you are offering a potential subscriber. It doesn’t have to be anything grand, or unique (though unique helps), but you should lay out what it is your channel offers. Every YouTube channel has an about page where you can describe your channel and what it offers. Put yourself in the mind of a potential subscriber and think what they might want to read that would give them a reason to click on subscribe.
Text like “My photography channel”, or “Photoshop tips” won’t inspire people to click on the subscribe button. Try “Join me in the highs and lows of my journey from school teacher to full time portrait photographer”, or “I’ll help you learn Photoshop in my fun and informative 5-minute videos. Grab a coffee and let’s learn Photoshop together”.
YouTube also lets you create a channel trailer, so when you have developed your skills with video, create a short video selling your channel so it’s the first thing new visitors see to your channel home page.
3 – Branding
Again, no matter if you will be content with a small channel or you’re aiming big, having consistent branding between your YouTube channel, website, and other social media platforms will help people identify and find you.
Fancy logos or graphics aren’t essential. Just use your face for your channel icon (the little circular picture that YouTube uses), and use one of your best photographs as your channel art. Even better, if you can integrate your channel message (see the previous tip) onto the channel art, it will add even more impact.

Try and match your social media username identifiers across all your platforms. Using a website such as Namechk will help you find a unique name. For example, I use @jbairdexp almost everywhere and people can find me with that name on YouTube, Twitter, Facebook, and Instagram. Some social media services will let you change your name retrospectively if you need to rebrand.
If you already have a Google login, you can associate that login with multiple accounts. So, if you already have a YouTube account, but the name is a bit random or you want to manage separate channels, create a new one with your new chosen name. You can still use the same Google login and then switch between YouTube accounts as needed.
4 – Create a Schedule
One of the key factors in creating a successful channel is to have a schedule. You need to decide how frequently you want to publish. Are you publishing every day, every week or every month?
Whatever you decide, be sure you can actually deliver it. There is little point in telling yourself, and your subscribers to expect a new video every day and you only deliver once per month. When you decide how often to publish try to pick a time and day that is consistent. So if you publish every week, do so on the same day of the week at a certain time.
Though the “notification” feature of YouTube will now send a subscriber an email or browser notification if they selected the notification (bell) icon on your page, this is optional and so publishing at the same time will encourage users to visit YouTube at specific times. The YouTube algorithm likes this.
5 – Have a Content Plan
Once you have your schedule sorted, you need a content plan. Keep a note of what you will be publishing and when. Even if you haven’t shot any of the content yet, having a note of what you will be publishing and when is advantageous. There’s nothing worse than getting to a Monday morning only to realise you have no idea what you are going to publish the Thursday of that week at 6 pm.
Content ideas will often spring into your mind at unusual times so carry a notebook and pen so you can make notes. I use Microsoft OneNote heavily to manage my thoughts and content plan for my YouTube channel. Other electronic note-taking applications are available such as Evernote.
6 – Be Yourself!
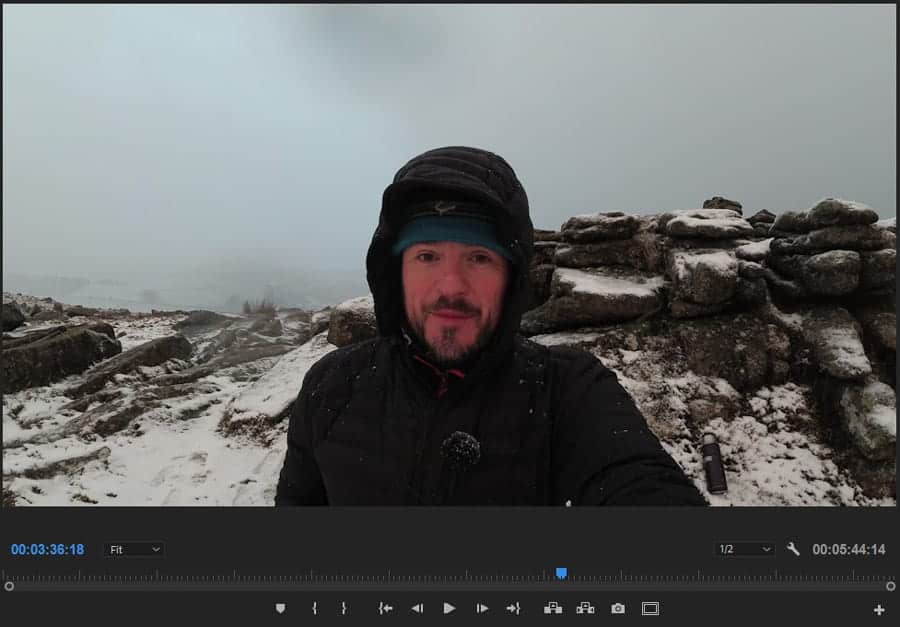
No matter if your creating videos on post-processing techniques or how to photograph models on mountain tops, be yourself! You will create much more engaging content if you aren’t trying to be something or someone you aren’t. You’ll be more relaxed and people are more likely to connect with you. Creating video is hard work so don’t make it more difficult by adding a new persona.
7 – Audio is King
Though YouTube is a visual format, the audio portion of your content is equally, if not more important than the video part. It doesn’t matter how good your video looks if your viewers can’t clearly hear what you are saying, you will lose them. People are a lot more forgiving of poor video as long as they can make out what you are saying.

Getting good audio doesn’t have to be expensive. If the camera you are using to record video has an input for an external mic, use it. What mic you choose to use will very much depend on your budget and where you will be in relation to the camera.
The microphone of choice for me is the Rode Smartlav+ lavalier mic. It's a wired mic but I tend to be relatively close to the camera. There are also wireless microphone options or external mics that sit on the hot-shoe of your camera. In almost all instances, these will all be better than the mic built into your camera.
If your camera doesn’t a mic input then you can use an external audio recorder. My choice here is the Zoom H1 recorder which records fantastic audio when I use it with my Rode Smartlav+ lavalier mic. One downside of this option is that you have to sync the audio to the video in post-production. However, this is fairly straightforward in modern post-processing applications such as Adobe Premiere Pro.
8 – Shoot Lots of B-Roll
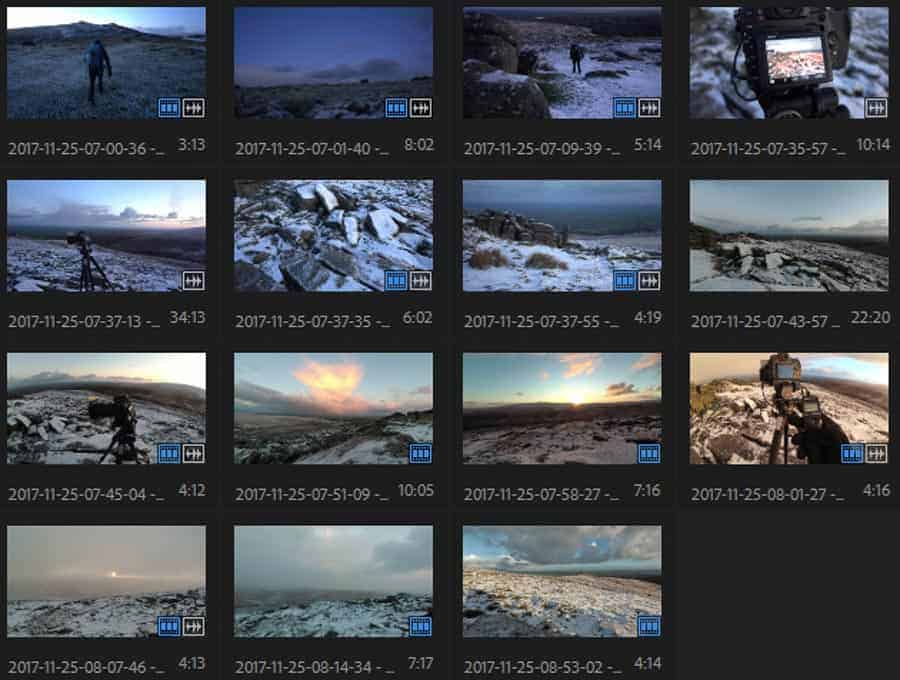
If you don’t know what b-roll is, it is typically supplementary or alternative footage cut into the main shot. For example, you could see me talking about changing a lens, then the footage briefly changes to a close up of me changing the lens on my camera. The audio of me talking is normally still heard while the alternative footage is shown. This is the concept of b-roll.
So why is it important? B-roll is an excellent storytelling tool. It can show a viewer an alternative angle, a close-up or wide shot of something you are discussing, or show something that is happening elsewhere.

B-roll is also rather handy at covering up cuts in your footage. For example, you may be describing something but you stumble your words. If you just cut the footage it could look a bit odd, but if you are playing your b-roll, you can cover up where you’ve done the cut on your main footage.
You can never really shoot too much b-roll.
9 – Learn a Video Editor
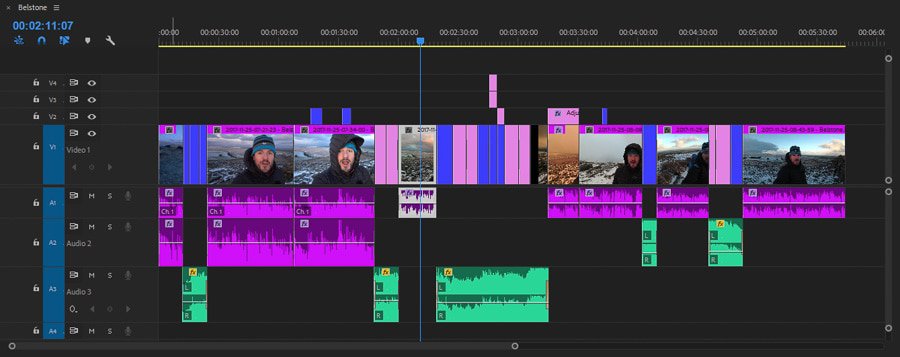
All that b-roll is a bit useless if you can’t use a video editor. Just like you had to learn Lightroom or Photoshop to edit your photographs, you will need to learn a video editor to edit your video content. There are a few free video editors out there, but the main paid for applications are Final Cut Pro for Mac and Adobe Premiere Pro for both Windows and Mac.
These applications can seem confusing to start with but thanks to YouTube there are a huge number of channels out there dedicated to taking your video editing skills from “home movie buff” novice all the way to “Hollywood Oscar winner”. However, some basic editing skills are all you really need. Your content should be doing most of the talking, not lots of whizz-bang effects.

10 – Become a Ruthless Editor
So you’ve got plenty of footage and b-roll, and you are a master of your video editor. As with your photographs though, less is often more. Don’t be surprised if a 5-minute video is made from over 30 mins of video footage. You should learn to be a ruthless editor of your footage. Does the clip you are inserting into your timeline add to the story you are telling? Just because you shot it doesn’t mean you need to use it.
Even if you use it, you don’t need to use all of it. Got a 30-second clip of you walking from one spot to the other? Does it actually need to be 30 seconds or will 5 seconds do? Have you just spoken for 3 minutes when actually 1 minute will have done? Cut the footage, and if you have it, cover the cut with some b-roll.
Don’t get attached to your footage. If it’s not needed, don’t include it. Make sure the story you are telling has a good pace and will keep your viewers focused.
11 – Engage with Community
No matter what your photography videos are about, there is likely to be a community of channels with similar interests. Though you might think you are “competing” with these other channels, by working together you can help your channel and others grow.
Try watching other peoples videos. See what they are doing and how they are doing it. Don’t just like their videos, leave comments as well. Get to know your fellow YouTubers and build relationships. Those relationships can lead to other things you can’t do by yourself such as collaborations. By engaging with the community you can help spread the word about not only your channel but others as well. You community as whole will benefit.
12 – Follow these Channels
Looking for a bit of creative inspiration for your YouTube channel? Well, I’ve already created a list of YouTube photography channels worth following. Check it out my article 21 Photography YouTube Channels to Subscribe To.
13 – A Note On Monetization
YouTube lets you turn on monetization when you’ve had more than 10,000 public channel views. This limit should be within the reach of most channels, but should you turn it on? If you turn it on at 10,000 views, your channel is likely to be too small to make any revenue worth bothering about. Ad-rates can be low, and it’s really a volume game.
If you are considering turning it on, ask yourself, do your viewers want to see adverts during your videos? Some people find the adverts annoying or distracting when they are displayed during your video, so if you are in the early stages of growing your channel, ask yourself if the small amount of ad revenue is worth it.
An easy way to make some money from your videos is to join Amazon Associates. Again, if you have a small channel this isn’t likely to make you rich, but by providing a few Amazon associate links in the video description you can at least make a few pence or cents.
I normally list the equipment I have used to make the video in the description along with Amazon links. If a viewer clicks the link and makes an Amazon purchase of anything (not just the product you listed), you will receive a small commission. It doesn’t impact the price they pay, and the links don’t interrupt the viewing experience because they are in the video description.
So there are my 13 tips for starting a photography YouTube channel. Yes, it can be a lot of hard work, but it can be very rewarding, you will learn new skills, and your photography will likely improve as well.
Do you have any tips? Let everyone know in the comments below.

I have been looking for where is the favorites.
This is the way that had been all we waiting for.